Menu Bar in PVRTexTool
This section covers the different options available from the menu bar in PVRTexTool. This menu bar provides quick access to several quick access to several useful options within PVRTexTool

Fig. 11 Menu bar
A selection of the menu bar options are available in the quick access menu which is located just below the menu bar.

Fig. 12 Quick access bar
Besides standard operations like loading, saving, and closing textures, this menu also allows:
Encoding the current texture to a new format
Selecting the input texture of a diff
Selecting a texture that the input texture will be diffed against
Displaying various error metrics for an encoded texture
Details of the individual menus with the menu bar can be found in the following sections. Using the tools and options within the menu bar will be covered in the rest of the manual.
File Menu in PVRTexTool GUI
The File menu provides options for handling texture files
The File menu provides options for creating and manipulating textures, opening and closing files, and exiting the GUI.
PVRTexTool supports the following texture formats:
.pvr (PowerVR texture)
.ktx and .ktx2 (Khronos texture)
.dds (Microsoft Direct Draw Surface)
.basis (Basis Universal Container)
Also, PVRTexTool is able to read BMP, JPEG, and PNG.
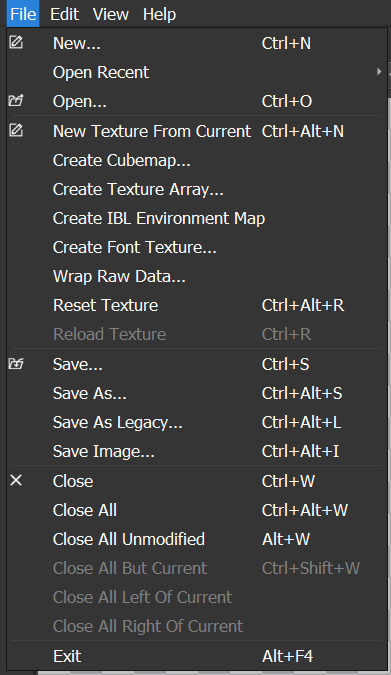
Fig. 13 File menu
The options in this menu are mostly self-explanatory or are covered in Texture Creation and Loading
Short explanations of some of the options are shown below.
Reset a Texture
To reset a texture, select File -> Reset Texture. Using this option undoes any changes made to the loaded image, and restores a copy of the image from memory. It is not re-read from disk, so for any changes that need reflecting from external sources, use the reload option.
Reload a Texture
To reload a texture, select File -> Reload Texture. Using this option reloads the current texture from disk reverting any pre-processing already carried out. If the file has been updated in some way by another program since being opened, this also updates the texture in memory to that which is currently stored on disk. Any encoded data produced is discarded by this operation. In instances where multiple files have been used, or the file has been processed from raw data, the relevant dialog box is launched instead of the file automatically reloading. This allows for channels to be rearranged and options to be adjusted, as required.
Save a Texture in a Legacy Format
To save a texture in the legacy PVR v2 format, select File -> Save As Legacy….
Warning
PVR v2 is deprecated and with limited support. Please update applications to use PVR v3.
Save as an Image File
To save a texture as an image file, select File -> Save Image…. This option allows the user to save the currently displayed texture to an image file, rather than a texture file. It also automatically appends the dimensions of the image to the end of the filename. Images can be saved in the following formats: BMP, JPEG and PNG.
Note
This option saves the current MIP map level. If a lower level is being displayed, then all other MIP map data will be lost. This can be used to save each MIP map level individually if needed.
Edit Menu in PVRTexTool GUI
The Edit menu provides options for undoing and redoing actions, encoding textures and padding file headers with metadata.
The Edit menu provides options for undoing and redoing actions, encoding textures and padding file headers with metadata. Using the Encode option in this menu is covered in Texture Encoding.
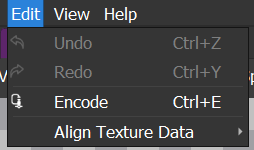
Fig. 14 Edit menu
Some of the non-obvious options available from this menu are detailed below.
Align Texture Data
To pad a file header by aligning the start of the texture data with a given byte boundary, select Edit -> Align Texture Data and select the desired option:
Align to 2 Byte Boundary - pads the file header with empty data so that the start texture data aligns to a 2-byte boundary.
Align to 4 Byte Boundary - pads the file header with empty data so that the start texture data aligns to a 4-byte boundary.
Align to 8 Byte Boundary - pads the file header with empty data so that the start texture data aligns to an 8-byte boundary.
View Menu in PVRTexTool GUI
The View menu provides various options for performing texture comparisons and customising the layout of the GUI. Performing texture diffs using the options in this menu is covered in Texture Comparison.
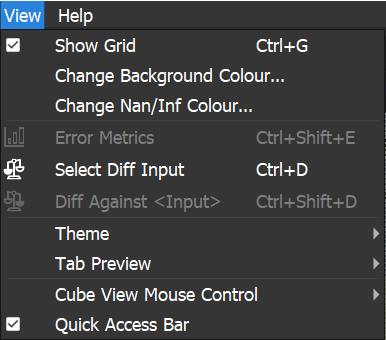
Fig. 15 View menu
Using the grid overlay
To assist with pixel critical tasks, such analysing block compressed textures, a grid can be overlayed each image view. This can be toggled on or off, by either pressing Ctrl+G or via the GUI at “View->Show Grid”.
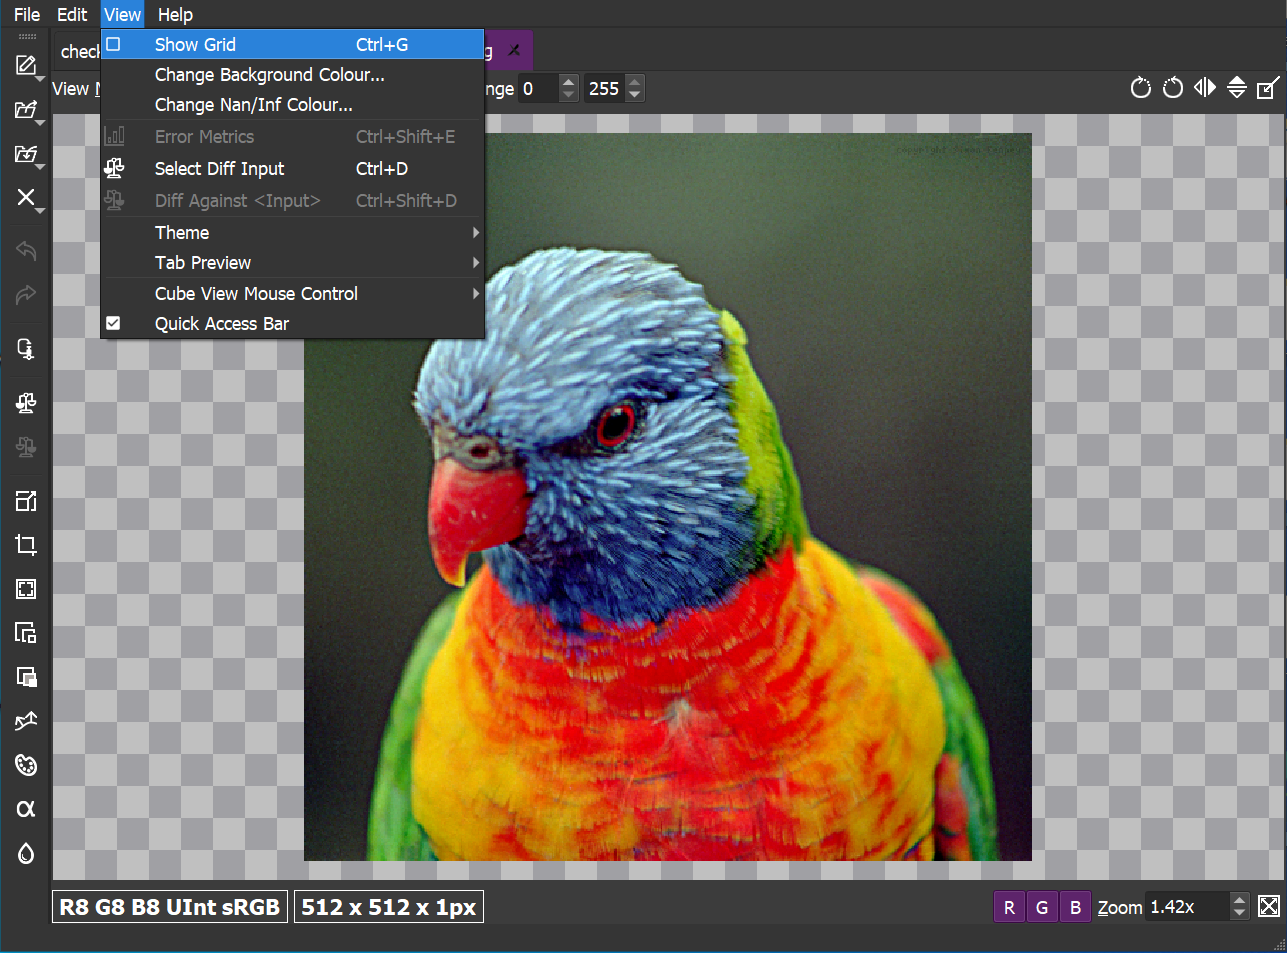
Fig. 16 Grid overlay off
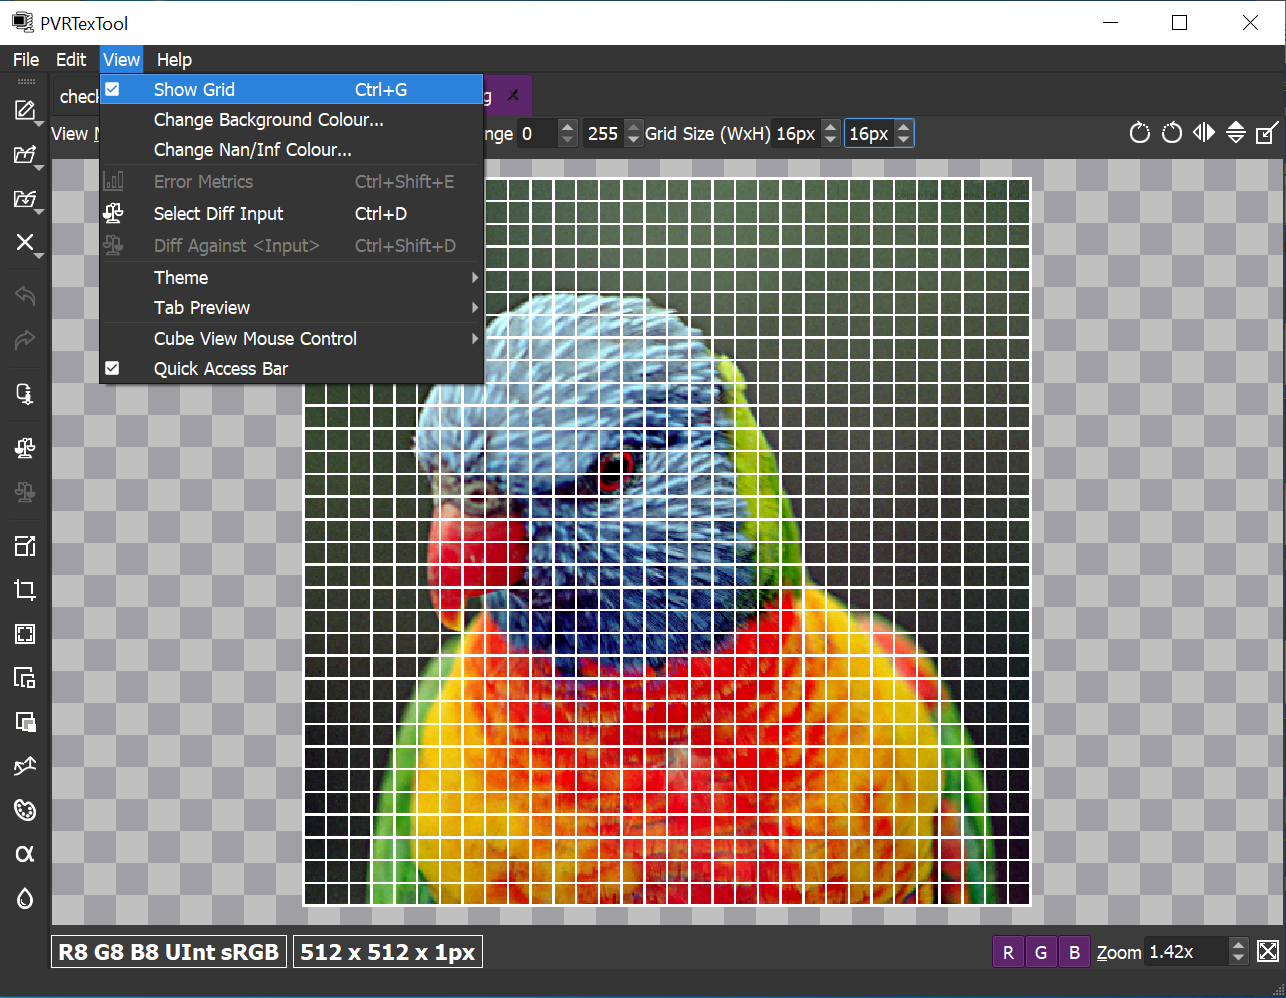
Fig. 17 Grid overlay on
The x and y dimensions of the grid are independently customisable through each image view’s toolbar.

Fig. 18 Grid overlay dimensions
Image tab previews
To assist with navigation between multiple loaded images, thumbnail previews can be enabled to show when hovering the mouse over an image tab. To enable/disable this feature open “File->Tab Preview”, and select from one of the following options:
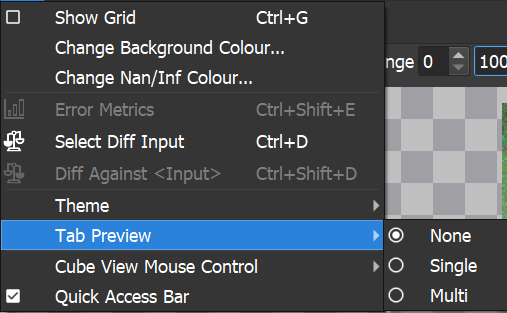
Fig. 19 View tab preview modes
Help Menu in PVRTexTool GUI
The Help menu provides access to help resources as well as other useful information about PVRTexTool
The Help menu provides options for accessing help resources, sending feedback, and viewing general release information.
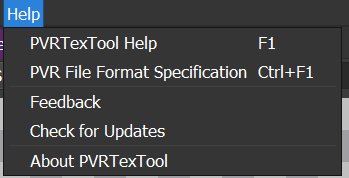
Fig. 22 Help menu


