Introduction
Getting Started
IDE Overview
If you have not used an integrated development environment (IDE) before, or want to know what kind of IDE PVRStudio is, go to IDE Overview.
User Interface
If you have not used PVRStudio before, and want to become familiar with the parts of the user interface, go to User Interface.
Configuring PVRStudio

To make PVRStudio behave more like your favorite code editor or IDE, you can change the settings for keyboard shortcuts, color schemes, generic highlighting, code snippets, and version control systems. For an overview of the options you have, go to Configuring PVRStudio.
Building and Running an Example
To check that kits for building and running were successfully installed as part of the installation, open an example application and run it. If you have not done so before, go to Building and Running an Example.
IDE Overview
PVRStudio is an integrated development environment (IDE) that provides you with tools for developing applications and deploying them to several desktop, embedded, and mobile operating systems. PVRStudio provides you with tools for accomplishing your tasks throughout the whole application development life-cycle, from creating a project to deploying the application to the target platforms.
Managing Projects
To be able to build and run applications, PVRStudio needs the same information as a compiler would need. This information is specified in the project settings.
Setting up a new project in PVRStudio is aided by a wizard that guides you step-by-step through the project creation process, creates the necessary files, and specifies settings depending on the choices you make. For more information, see Managing Projects.
Coding
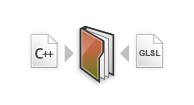
As an IDE, PVRStudio differs from a text editor in that it knows how to build and run applications. It understands the C++ and other languages as code, not just as plain text. This enables it to provide you with useful features, such as semantic highlighting, checking code syntax, code completion, and refactoring actions. PVRStudio supports some of these services also for other programming languages, such as Python, for which a language server is available that provides information about the code to IDEs. For more information, see Coding.
Building & Running
PVRStudio is integrated with cross-platform systems for build automation, such as CMake. In addition, you can import projects as generic projects and fully control the steps and commands used to build the project. PVRStudio provides support for running and deploying applications built for the desktop environment or a device. Kits, build, run, and deployment settings allow you to quickly switch between different setups and target platforms.
For more information, see Building and Running.
Testing

PVRStudio is integrated to several external native debuggers: GNU Symbolic Debugger (GDB), Microsoft Console Debugger (CDB), and internal JavaScript debugger. In the Debug mode, you can inspect the state of your application while debugging.
The memory and CPU power available on devices are limited and you should use them carefully. PVRStudio integrates Valgrind code analysis tools for detecting memory leaks and profiling function execution.
You can use PVRStudio to create, build, and run autotests.
For more information, see Testing.
Configuring PVRStudio
If you install PVRStudio, you should be able to use it out-of-the-box, with the default settings and configuration options.
To make PVRStudio behave more like your favorite code editor or IDE, you can change the settings for keyboard shortcuts, color schemes, generic highlighting, code snippets, and version control systems. In addition, you can enable experimental plugins and disable plugins that you do not need.
The following sections summarize the options that you have and point you to detailed information to help you specify any required settings and to make using PVRStudio a better experience for you.
Checking Build and Run Settings
PVRStudio is an integrated development environment (IDE) that you can use to develop applications. The relevant kits will automatically become available in PVRStudio. If they do not, you must add the kits yourself to tell PVRStudio where everything is.
To add kits, select Tools > Options > Kits > Add.
For more information, see Adding Kits.
Each kit consists of a set of values that define one environment, such as a device, and compiler.
Also check that your compiler is listed in Tools > Options > Kits > Compilers.
For more information, see Adding Compilers.
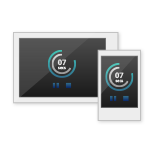
You can connect devices to the development PC to run, debug, and analyze applications on them from PVRStudio. You can connect the device to the development PC via USB. Additionally, you can connect Linux-based devices over a WLAN. You must also configure a connection between PVRStudio and the development PC and specify the device in a kit.
To add devices, select Tools > Options > Devices > Devices > Add.
For more information, see Connecting Devices.
Changing Keyboard Shortcuts
You can use PVRStudio with your favorite keyboard shortcuts.
To view and edit all keyboard shortcuts defined in PVRStudio, select Tools > Options > Environment > Keyboard. For more information, see Keyboard Shortcuts.
Changing Color Schemes
Themes enable you to customize the appearance of the PVRStudio UI: widgets, colors, and icons.
To switch themes, select Tools > Options > Environment, and then select a theme in the Theme field.
You can use the PVRStudio text and code editors with your favorite color scheme that defines how code elements are highlighted and which background color is used. You can select one of the predefined color schemes or create custom ones. The color schemes apply to highlighting C++ files, and generic files.
To change the color scheme, select Tools > Options > Text Editor > Fonts & Color.
For more information, see Defining Color Schemes.
Generic highlighting is provided by KSyntaxHighlighting, which is the syntax highlighting engine for Kate syntax definitions. PVRStudio comes with most of the commonly used syntax files, and you can download additional files.
To download and use highlight definition files, select Tools > Options > Text Editor > Generic Highlighter.
For more information, see Generic Highlighting.
Adding Your Own Code Snippets
As you write code, PVRStudio suggests properties, IDs, and code snippets to complete the code. It provides a list of context-sensitive suggestions to the statement currently under your cursor. You can add, modify, and remove snippets in the snippet editor.
To open the snippet editor, select Tools > Options > Text Editor > Snippets.
For more information, see Editing Code Snippets.
Configuring Version Control Systems
PVRStudio supports several version control systems. In most cases, you do not need to configure the version control in any special way to make it work with PVRStudio. Once it is set up correctly on the development PC, it should just work.
However, some configuration options are available and you can set them in Tools > Options > Version Control > Common.
For more information about the supported functions, see Using Version Control Systems.
Enabling and Disabling Plugins
New PVRStudio plugins are often introduced as experimental plugins to let you try them out before they are fully supported. Experimental plugins are disabled by default and you must enable them for them to become visible after you restart PVRStudio. By default, all the plugins that the plugin depends on are also enabled.
You can also disable plugins that you do not use, to streamline PVRStudio. By default, all the plugins that depend on the plugin are also disabled.
To enable and disable plugins, select Help > About Plugins.
Building and Running an Example
You can test that your installation is successful by opening an existing example application project.
To run an example application on an Android, you must set up the development environment for Android. For more information, see Connecting Android Devices.
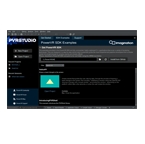
In the Welcome mode, select Examples.
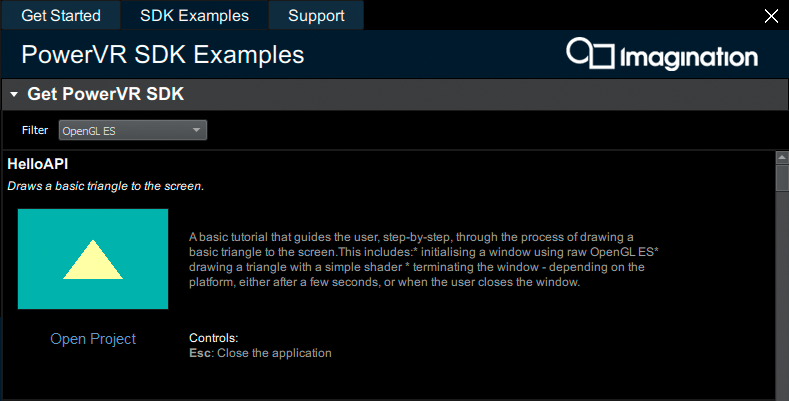
Install the PowerVR Graphics SDK using the GitHub link in “Get PowerVR SDK”. After installation, browse your system to find the folder where the SDK has been installed.
Select an example in the list of examples.
You can also sort your examples selecting the graphical API: Vulkan, OpenGL ES or OpenCL.
Click on “Open Project” to load the example’s project.
To check that the application code can be compiled and linked for a device, click the Kit Selector and select a kit for the device.
If you installed PVRStudio, it should have automatically detected the installed kit. If no kits are available, see Adding Kits.
Click image:: images/run_small.png (Run) to build and run the application.
To see the compilation progress, press Alt+4 to open the Compile Output pane.
If build errors occur, check that the compiler is installed and configured and that the necessary kits are configured. If you are building for an Android device, check that the development environment has been set up correctly.
The Build progress bar on the toolbar turns green when the project is successfully built. The application opens on the device.